Spring Wreaths for the Window - Frühlingskränze fürs Fenster

A long time ago I bought the moss wreaths because I instantly fell in love with them. I knew I eventually would be able to use them for some decor project. Spring felt like the right time to use them, so I went and tried to find things to decorate with. I find that craft, decor and DIY stores are always a good place to go to. I like to pick a color scheme before I go, so I am not all over the place color wise. I also wanted to use some real flowers which put me in quite the dilemma. I love colorful flowers like narcissus, but they will look pretty for a week and then be limp because of the lack of water and the warmth inside the apartment. So I had to find a flower that is nice and easy to dry. I ended up buying willow catkin and baby’s breath which turned out to be an adorable combo.
Here is how I made it:
You need:
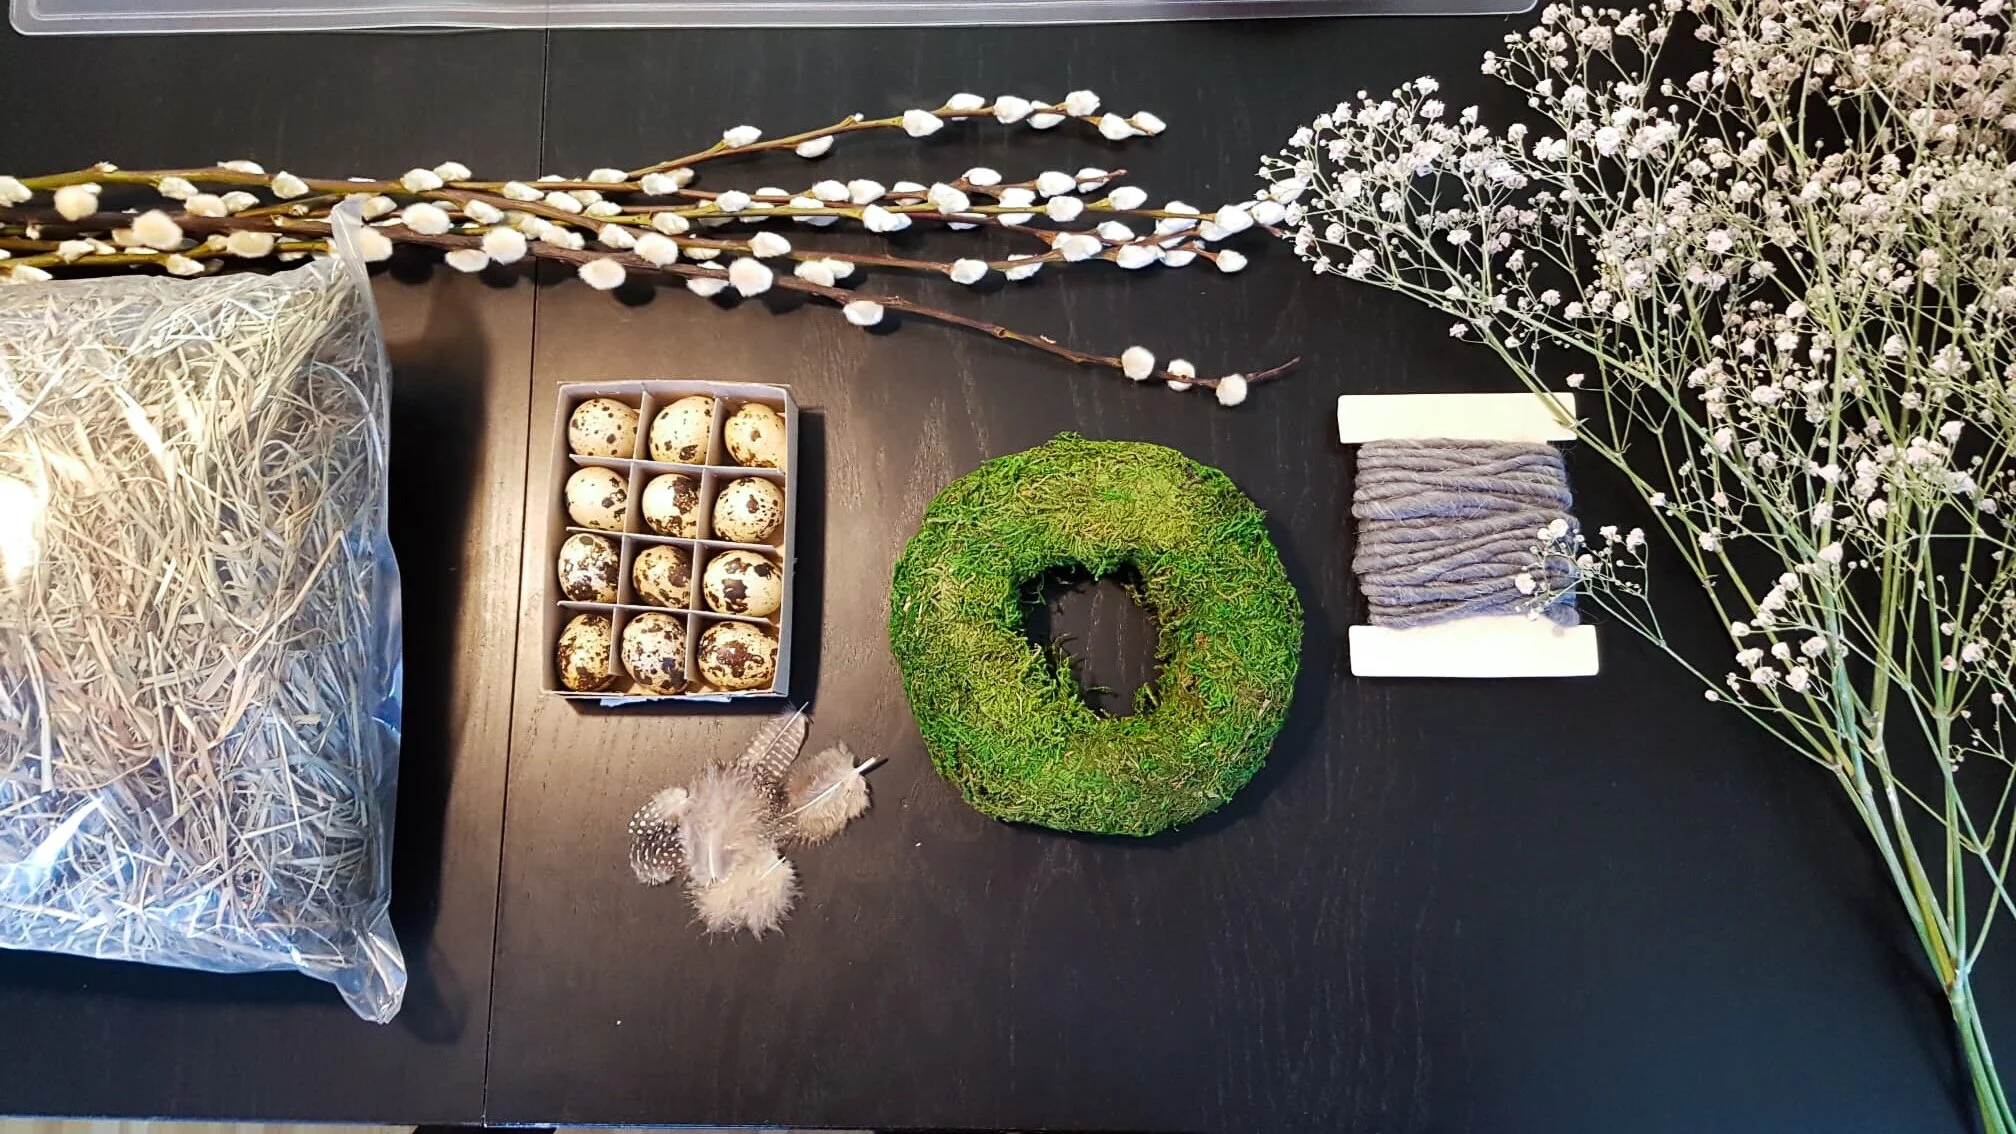
Moss wreath
Feathers
Quail eggs (you can also use broken chicken egg shells)
Ribbon
Paper and stamps or wood in the shape of a flower or butterfly
Willow catkin
Baby’s breath
Hot glue
wire
Scissors
Thread and suction cups (if you are planning on hanging the wreaths on the window)
Instructions:
Lay out the decor on the wreath and place it as you like it. Once you like the look, you can start gluing everything to the wreath. Sometimes it might be helpful to wrap wire around the baby’s breath stems, so they stay packed.
Attach a tiny piece of thread to the wreath and hang it on the window with the suction cups.
The Susslife Tip: Try to find elements with different shapes for decorating, so that it looks more interesting. For my wreaths I used the long willow catkins, the bushy baby’s breath and the round paper.

Vor einer ziemlichen Weile habe ich diese Mooskränze gekauft und wusste, dass ich irgendwann Verwendung dafür finden würde. Jetzt, im Frühling, schien die Zeit reif zu sein. Also machte ich mich auf den Weg um Dekoelemente dazu zu finden. Deko-, Bastel- und DIY Läden sind dazu immer gut geeignet. Meistens entscheide ich mich zuvor für eine Farbe, damit nicht alles kunterbunt wird. Ich wollte ebenfalls echte Blumen zum Dekorieren verwenden, was mich zu einem Problem führe. Ich mag Narzissen, aber ohne Wasser und bei der Wärme in der Wohnung, wären sie nur sehr kurz schön gewesen. Eine Blume, die einfach zu trocknen war, musste ich also finden. Schlussendlich entschied ich mich für Wiedenkätzchen und Schleierkraut, was eine hübsche Kombination ist.
So habe ich die Kränzchen gemacht:
Material:

Mooskranz
Federn
Wachteleier (man kann auch zerbrochene Schale von normalen Hühnereiern nehmen)
Bänder
Papier und Stempel oder Holz in Blumen- oder Schmetterlingsform
Weidekätzchen
Schleierkraut
Heissleim
Draht
Schere
Faden und Saugnäpfe, wenn ihr sie am Fenster aufhängen wollt
Anleitung:
Lege alle Dekoelemente auf den Mooskranz, so wie es dir gefällt. Dann fixiere alles mit Heissleim. Manchmal kann es hilfreich sein, die Stiele des Schleierkrauts mit Draht zusammen zu halten.
Befestige ein kurzes Stück Faden am Kranz und hänge ihn mit Hilfe des Saugnapfes ans Fenster.
The Susslife Tipp: Suche zum Dekorieren Elemente mit verschiedenen Formen und Längen. Bei meinen Kränzchen sind es zum Beispiel die langen Weidekätzchen, das buschige Schleierkraut und die Runden Papierschnipsel.

