Makrame Coaster - Makramee Untersetzer

Titel -2.jpg

Alright, I finally fell for the trend as well and made a makrame coaster. On our Germany trip I saw this pretty yarn in one of the shops. Do you ever buy something because it looks super pretty in the store with all the surroundings and then at home you realize that the thing you bought mainly looked amazing because of how everything was displayed? Well, that’s kind of what happened with the Makrame yarn. But since I had it, I thought I might as well use it now. A lot of the makrame ideas look like they are rather difficult to make, especially when you’re not so much into knots… The coaster though turned out to be really easy and a nice little evening project.

What you need:

  • Makrame yarn

    • You will want to think about the thickness. Part of my problem was that I bought a really thick yarn which already crossed out a lot of really fun projects, like a key chain. For the coaster my 5mm thick yarn turned out to be practical.

  • Scissors

  • Measuring tape or ruler

  • Needles

  • Cork coaster or something to attach the coaster to while working on it

How to:

  1. Preparations: Cut 1 long piece to 180cm and 5 shorter pieces to 85cm. You also need 15 pieces of 75cm length.

  2. Lay the long piece into a loop. One end should be pretty short like in the photo below. Then take the 5 pieces of 85cm length and fold it in half. Lay the loop end under the long piece and make it into a knot like down below. Do that with all 5 pieces.

Start.jpg
Start+2.jpg

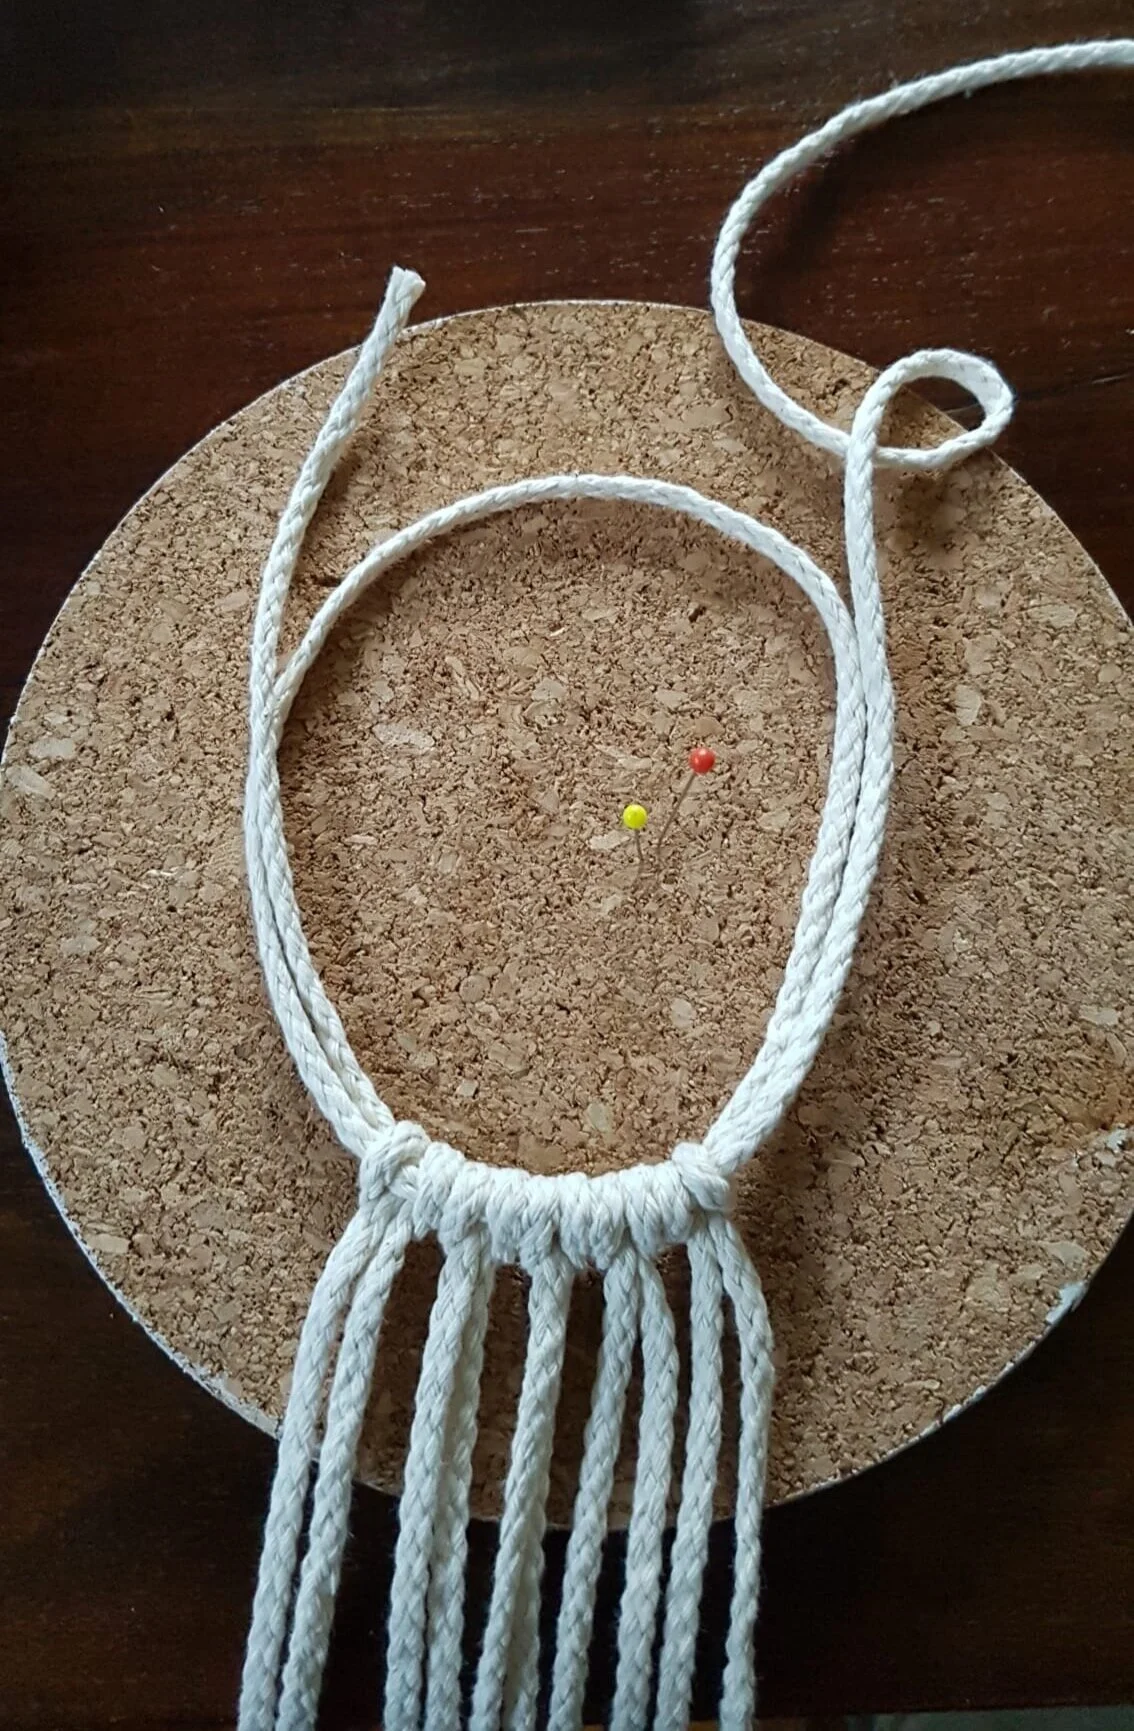
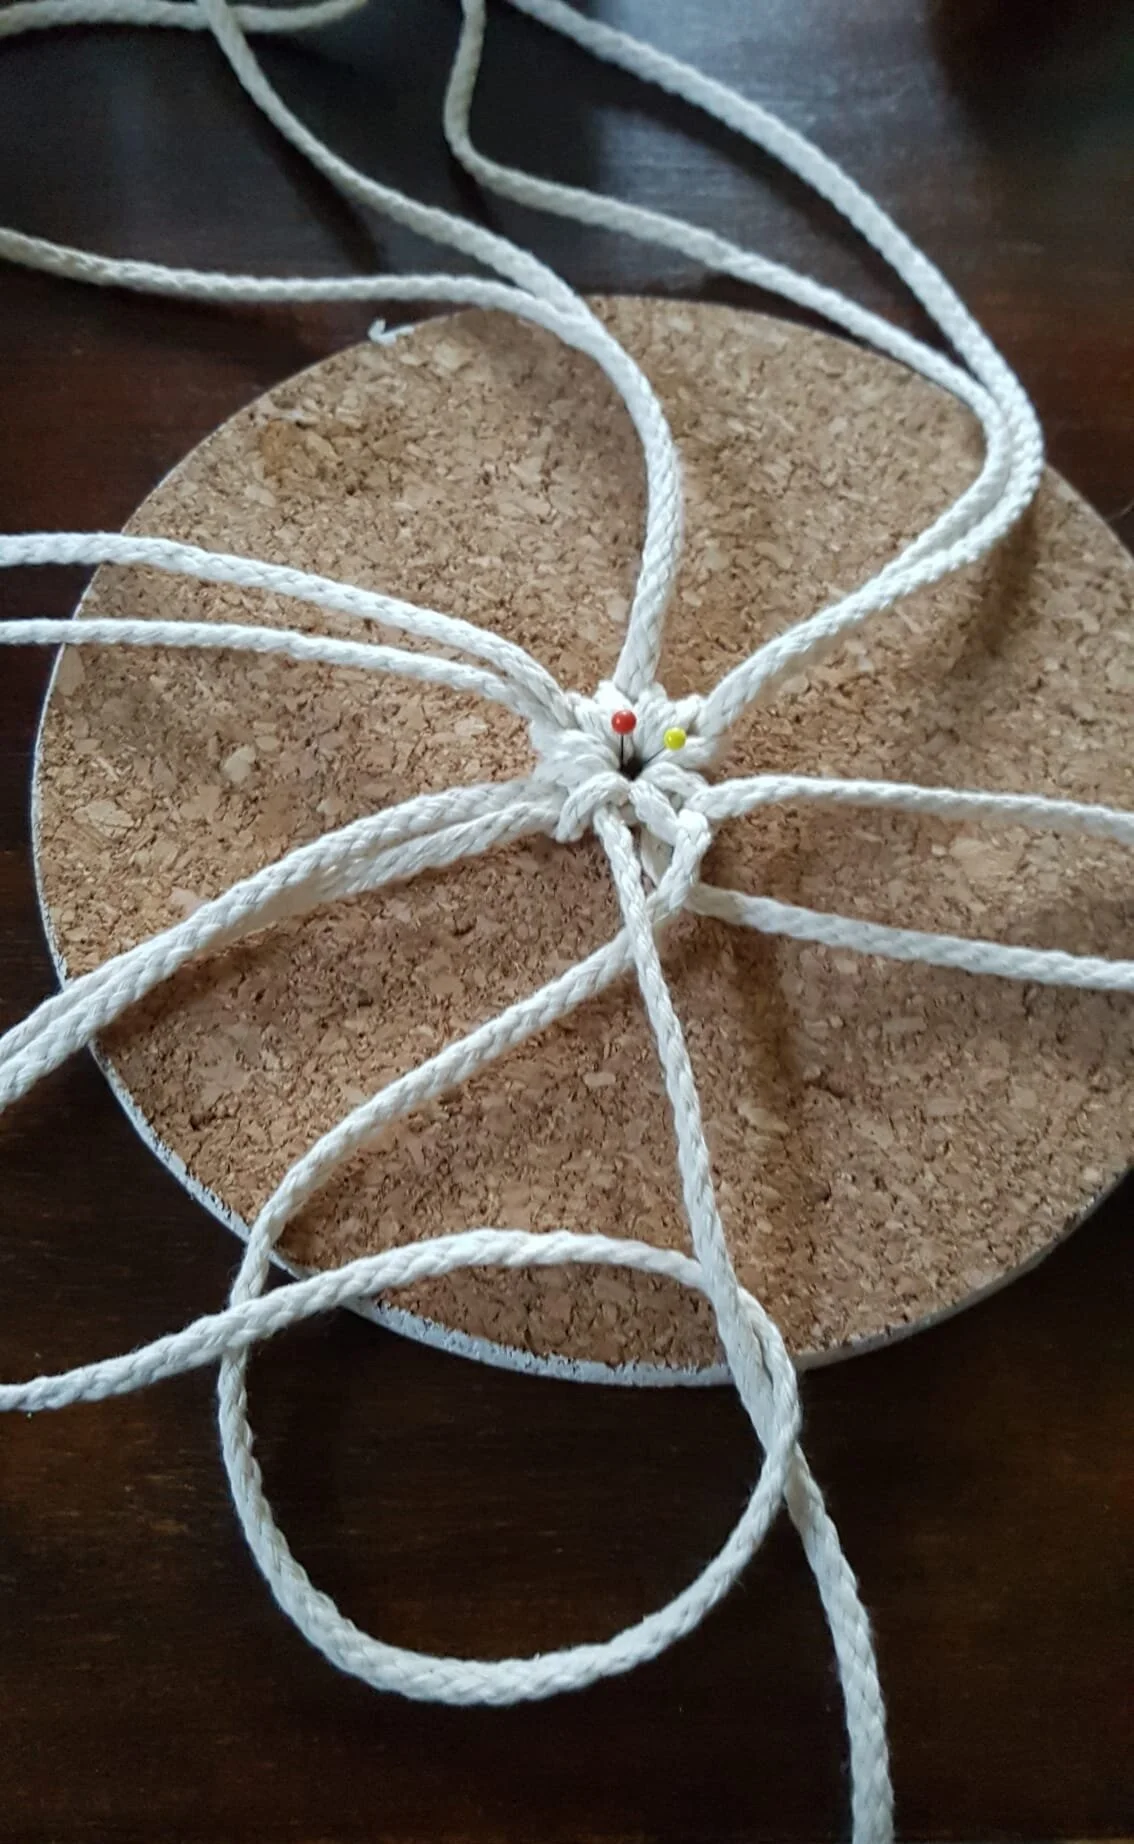
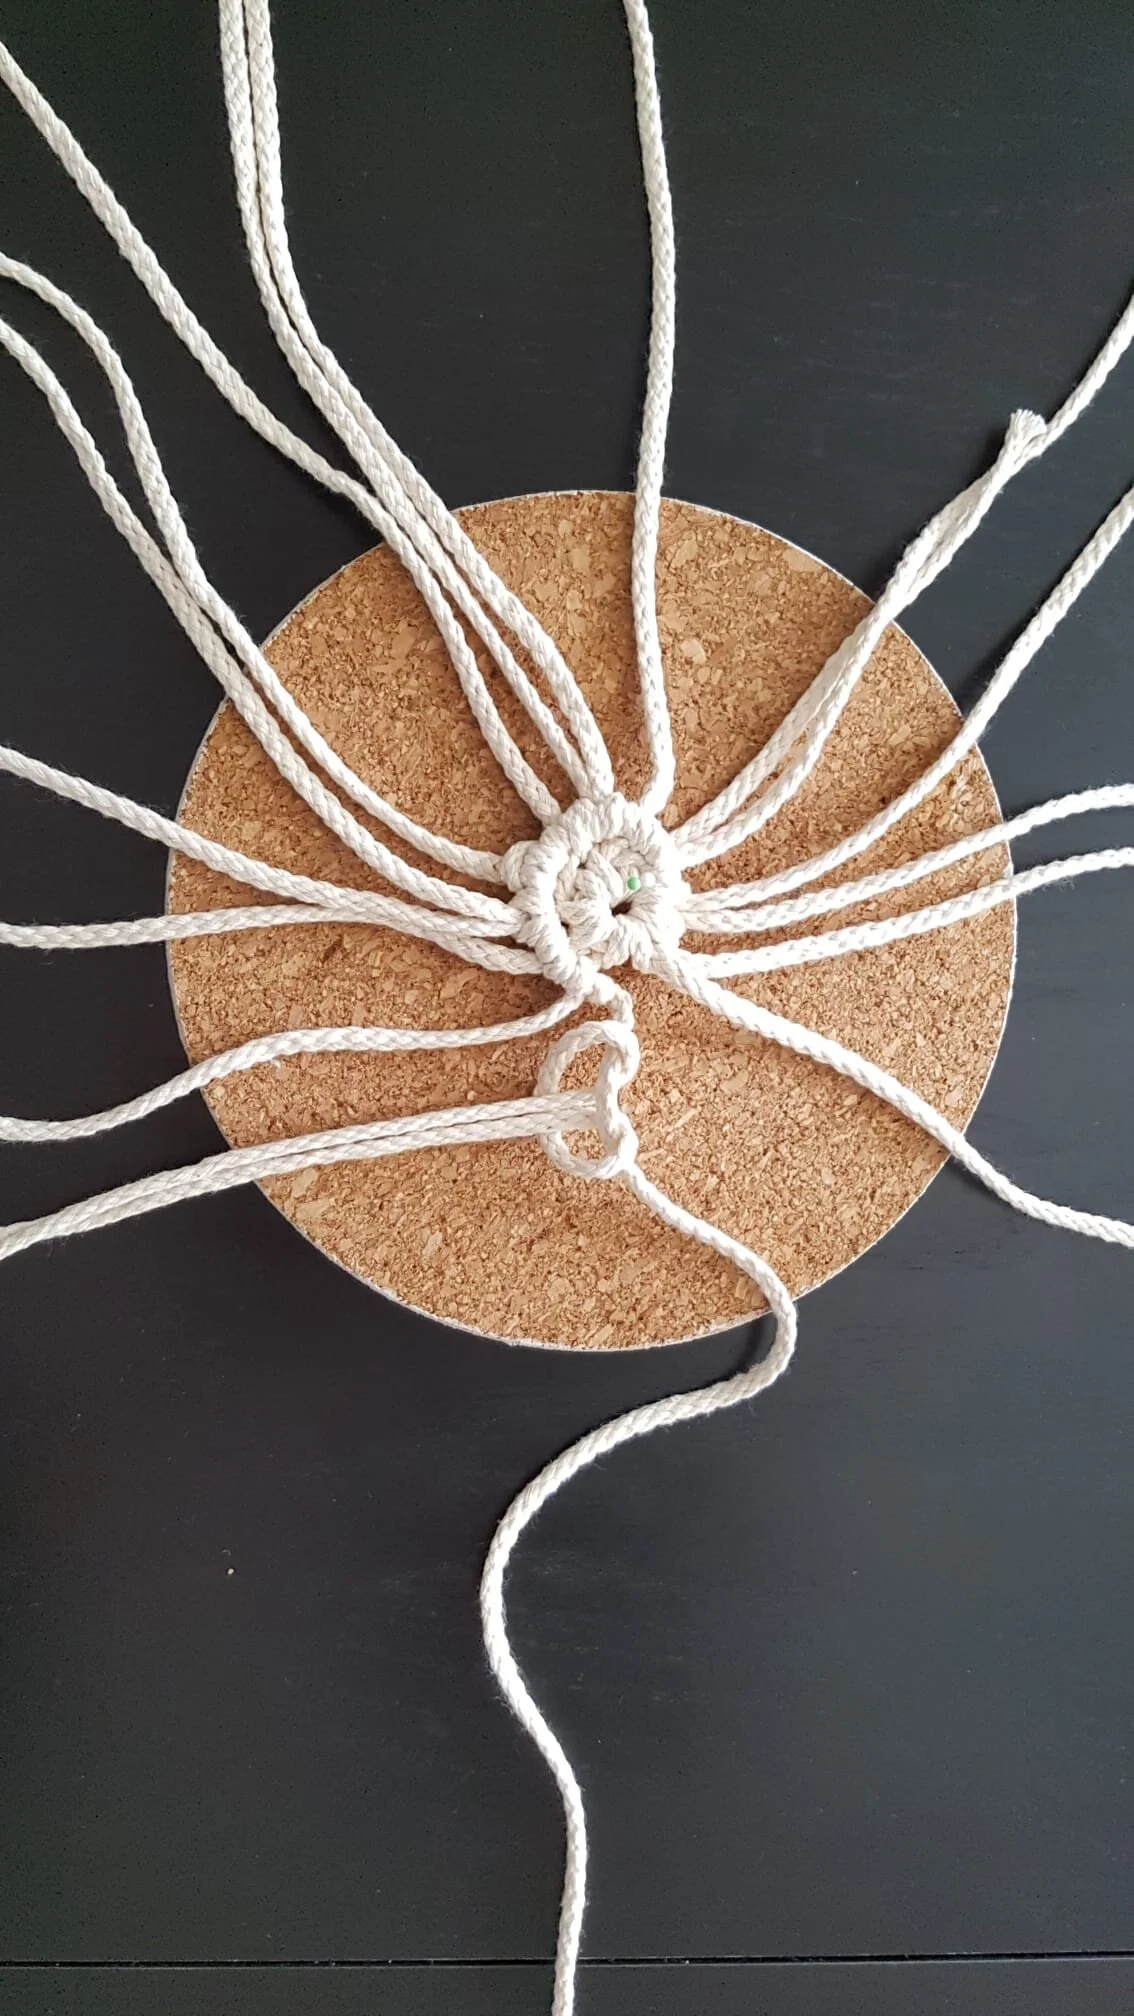
3. Now pull on the long end of the long piece so you get a circle like down below. The longest thread will be your holding stand. Don’t worry about the short end, you can ignore that one until the end.

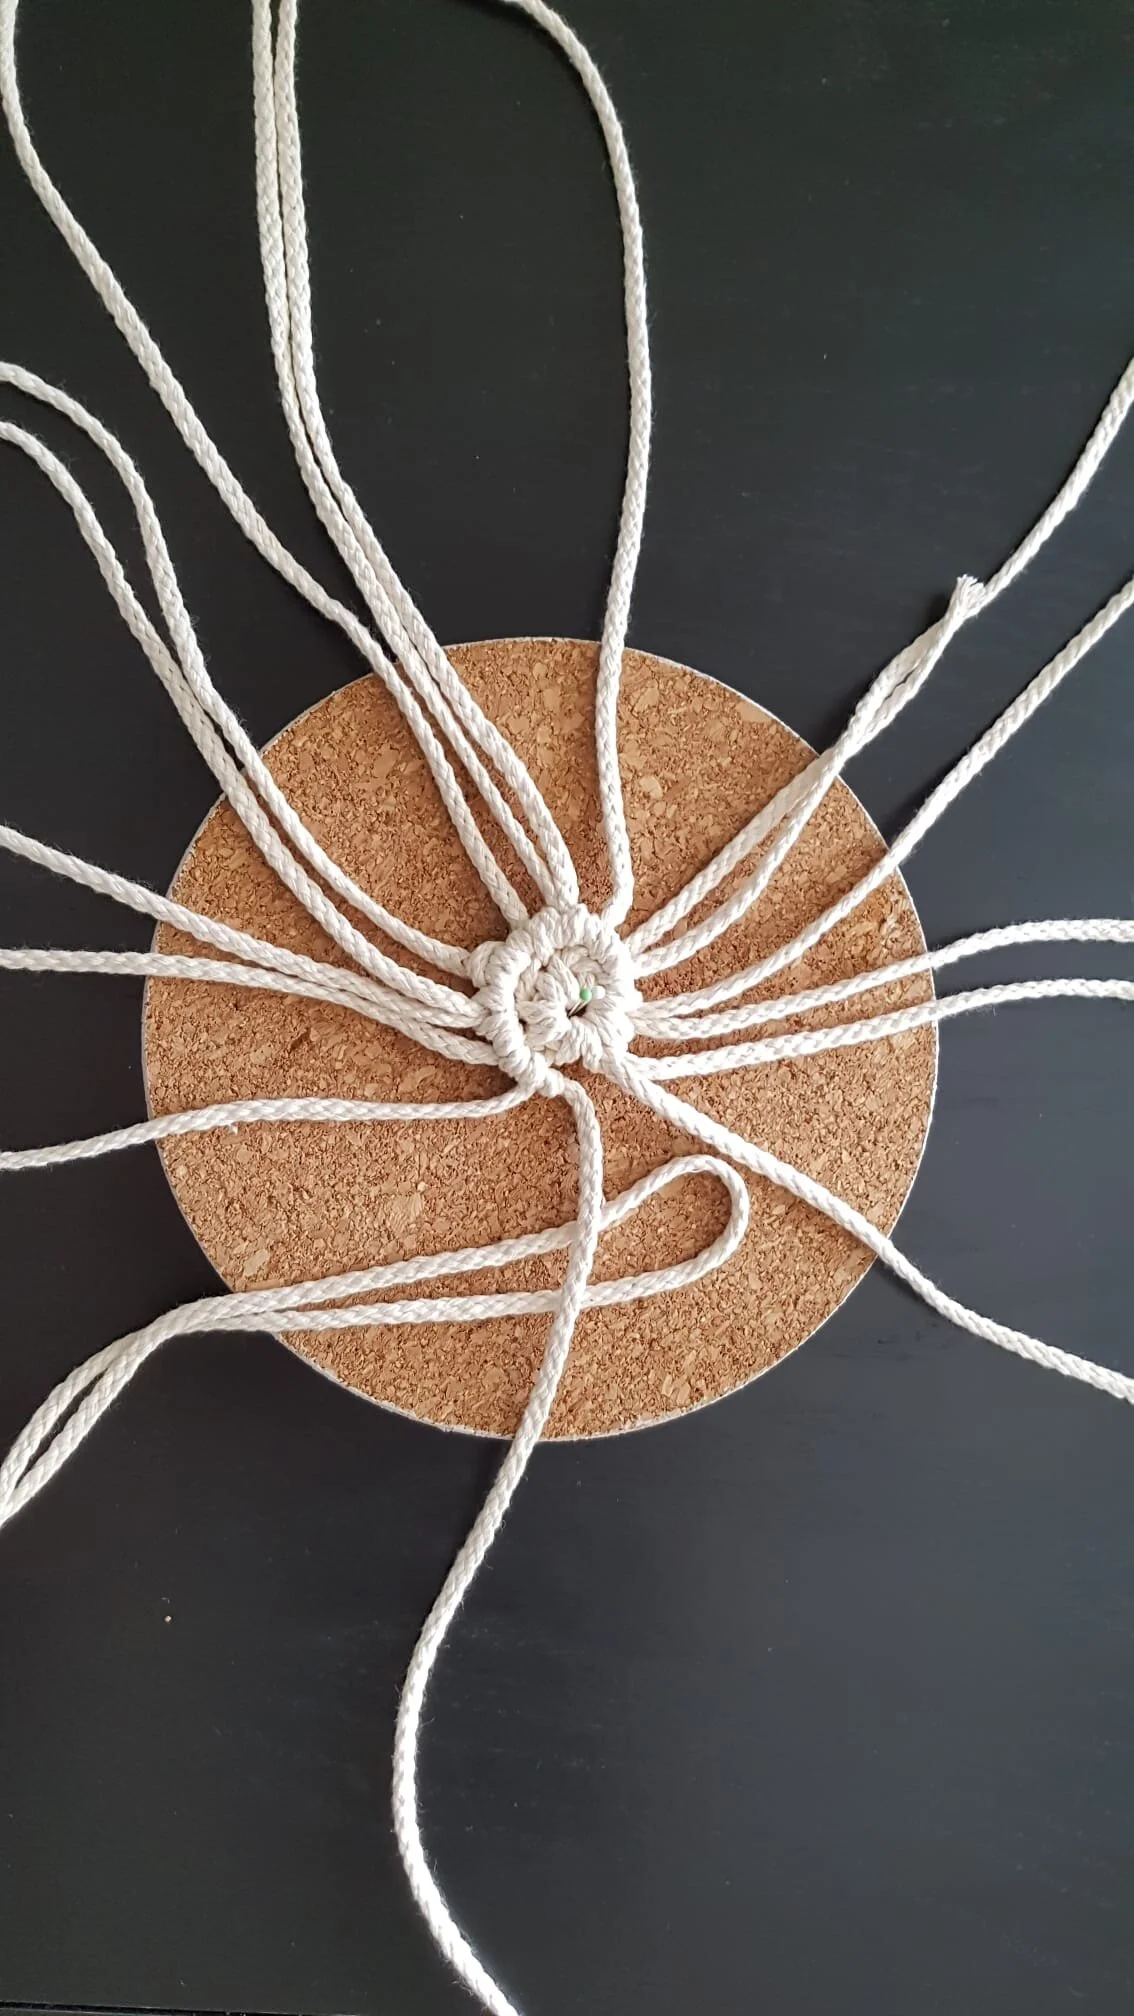
Now take the yarn that is to the right of the holding strand and move it under the holding strand. Then go over it and underneath again. You can see the knot in the photo below. Pull it tight and hold on to the holding strand and then make the same knot again, so twice per strand. This is what you will do with all the threads until you come across a big gap.

WhatsApp+Image+2020-11-04+at+11.29.47+%281%29.jpg
Knoten.jpg

4. Sometimes it feels like the gap to the next strand is pretty big. That’s where you insert one of the 15 short threads. It is the same knot like in the beginning. Fold the thread in half, lay it under the holding strand and pull the other end through. Make it tight and move on to the next strands. Keep moving on with step 3 and 4 until you’ve reached your chosen size or the threads become too short.

Einsetzen 1.jpeg
Einsetzen.jpeg

5. Take the holding stand and tie it into a knot like shown in the photo. The short end of the holding strand should now be on the underside of the coaster. Tie it the same way and cut it very short.

Schlussknoten.jpg

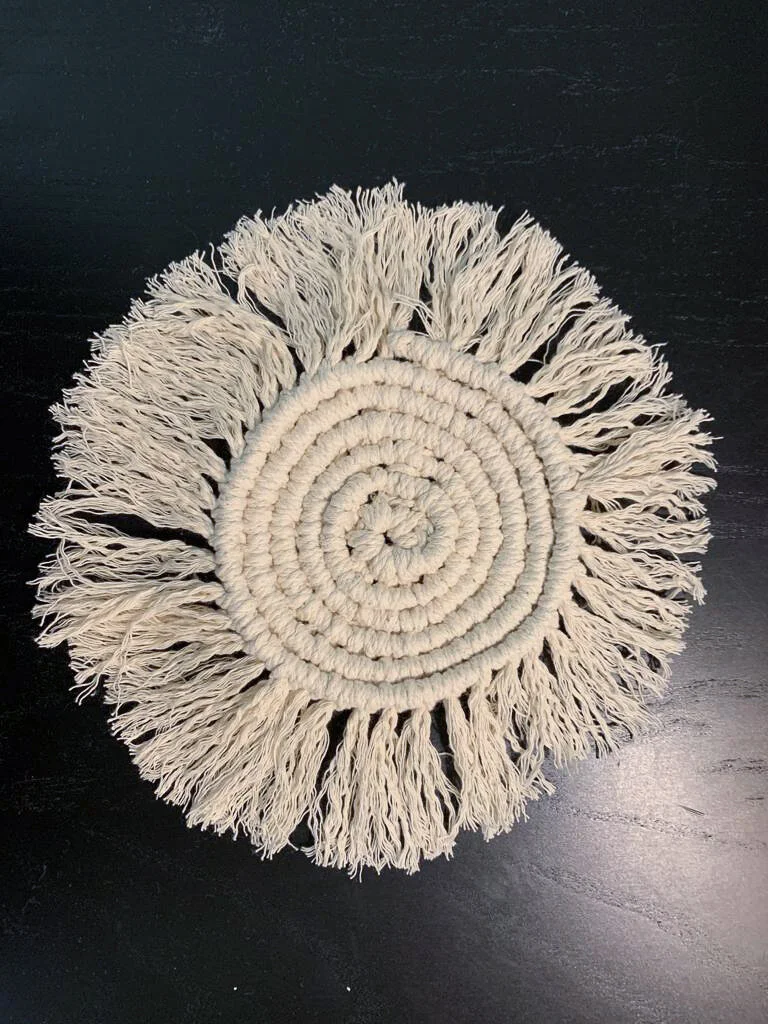
6. Find something round in your house that has about the same size of the coaster. Lay it on top and cut all the strands into the same length. Take a comb (probably a smaller one than mine but that was all we had) and comb out the ends. After you’re done you will have to cut the ends again to make them more even. And that is it! You’ve made your first Makrame coaster!

Tip: If your coaster ends up bending one way you can iron it or soak it in water. Then press it with a vase or a heavy plate.

Abschneiden.jpg
Ausfransen1.jpg
Ausfransen.jpg
Fertig.jpg
Titel 2-2.jpg

Okay, jetzt habe ich mich doch noch von dem Makramee-Trend verleiten lassen… Auf unserer Deutschlandreise habe ich das Garn in einem Laden gefunden. Kauft ihr auch manchmal Sachen, die im Laden mit Allem rundum wunderschön aussehen und dann zu Hause realisiert ihr, dass es hauptsächlich so schön war, weil es so ausgestellt wurde? Ja, so etwa war das mit dem Makrameegarn. Aber da ich es schon hatte, konnte ich es ja grad so gut benutzen. Viele der DIYs sahen etwas kompliziert aus, vor allem, da ich es nicht so mit den Knoten habe… Der Untersetzer jedoch war ziemlich einfach und ein Projekt für einen Abend.

Das braucht es:

  • Makrameegarn

    • Hier solltet ihr über die Dicke des Garns nachdenken. Teil meines Problems war, dass ich ein dickes Garn von 5mm gekauft habe und das zu dick war für einige schöne filigrane Dinge wie Schlüsselanhänger. Für den Untersetzer eignet sich diese Dicke aber gut.

  • Schere

  • Massband oder Massstab

  • Nähnadeln

  • Korkuntersetzer oder Etwas um die Arbeit festzumachen

Anleitung:

  1. Vorbereitung: Ein langes Stück Garn auf 180cm zuschneiden. Dann 5 Stücke auf 85cm und 15 Stücke auf 75 cm schneiden.

  2. Nimm das längste Stück und lege es in eine Schlaufe wie auf dem Bild. Das eine Ende sollte dabei relativ kurz sein. Nimm dann eines der 5 Schnüre und falte es in der Hälfte. Lege dieses Stück unter das lange Stück. Mache einen Knoten wie im Foto. Wiederhole diesen Schritt mit allen 5 Schnüren.

Start+2.jpg
Start.jpg

3. Jetzt am langen Ende der langen Schnur ziehen, sodass sich der Kreis schliesst. Der längste Faden ist jetzt der Leitfaden. Das kurze Ende könnt ihr beim Knoten einfach ignorieren.

Nimm jetzt den Faden rechts vom Leitfaden und führe ihn unter dem Leitfaden durch. Danach geht es zurück über den Leitfaden und wieder unten hindurch. Das siehst du auch im Foto unten. Dann denn Leitfaden straff halten und den Knoten anziehen. Diesen Schritt mit dem selben Faden nochmals wiederholen. Das machst du so lange, bis es einen zu grossen Abstand zum nächsten Faden gibt.

WhatsApp+Image+2020-11-04+at+11.29.47+%281%29.jpg
Knoten.jpg

4. Ziemlich schnell kommt man an einen Punkt, bei dem der Abstand zum nächsten Faden zu gross scheint. Hier kommen die anderen 15 Fäden zum Zug. Es funktioniert gleich wie am Anfang. Den Faden halbieren und unter den Leitfaden legen. Dann das andere Ende durch die Schlaufe ziehen. (Siehe Bild) Danach geht es weiter mit dem Knoten mit dem nächsten Faden. Die Schritte 3 und 4 werden nun so lange wiederholt, bis der Untersatz die gewünschte Grösse hat oder die Fäden zu kurz werden.

Einsetzen 1.jpeg
Einsetzen.jpeg

5. Nimm den Leitfaden und verknote ihn wie im Foto. Das kurze Ende des Leitfadens sollte nun unter dem Untersatz sein. Dieses Ende genauso verknoten und kurz abschneiden.

Schlussknoten.jpg

6. Suche etwas Rundes im Haus, welches etwa die Grösse des Untersetzers hat. Lege es darauf und schneide die Fäden alle auf die gleiche Länge. Nimm einen Kamm (wahrscheinlich einen feineren Kamm wie meiner, aber es geht auch so) und beginne mit dem Ausfransen. Wenn du fertig bist, musst du wahrscheinlich nochmals nachschneiden, damit alles etwa gleich lang ist. Und schon hast du es geschafft!

Tipp: Wenn sich der Untersatz in eine Richtung biegt, kannst du ihn einfach mit dem Bügeleisen glattbügeln oder in Wasser einlegen und mit einer Vase oder schwerem Teller flach pressen.

Abschneiden.jpg
Ausfransen1.jpg
Ausfransen.jpg
Fertig.jpg
Titel 2-2.jpg